INSTRUCTIONS
for
Printing, Folding, and Cutting the Shepherd's Rod Literatures
from
Printable Document Files (PDF).
To go directly to other sections in this article, please click a link in the 3-item menu list below, or scroll down with your mouse.
| The printing process. |
| Folding and cutting instructions. |
| Choices for speed of production. |
Objectives:
- To print original-based Shepherd's Rod tract size literature in the convenience and comfort of your own home using affordable and portable equipment, even by yourself!
- To suggest different processes that can be accomplished by one person or, with a larger group of like-minded believers.
- To provide simple step-by-step instructions which will have you producing your very own Rod literature in little time.
- To use minimal printing equipment, this being a basic personal computer (Windows, or Mac OS), a laser printer, a long reach stapler, a straight edge ruler, and a razor knife, unless the next level can be afforded. Please see other choices of production speed at the end of this instruction article.
The Printing Process:
1. Visit the website www.upa7.org.
2. Please click to open the "literatures" link on the menu bar of the website to view major sections of printable literature in their appropriate subfolders (Tracks; Misc. Tracks; Answerer Books; Timely Greetings, Vol. 1; Timely Greetings, Vol. 2). Please click to open the desired subfolder.
3. After locating the desired tract of which you are interested, please click the title to download a printable document file (PDF) of the track onto your desktop from the website. This should automatically open if you have a copy of Acrobat Reader (version 5.0 or later) installed on your computer.
Please note:
- Once the Acrobat Reader program opens the file, go to the Page Setup button under the File menu and set the Format to: "Any Printer"
- Set the Paper Size: to “US Legal” (8.5 in. x 14 in.).
- Make certain that the Page Scaling option box is set to: "None".
- The Preview: composite box should show a document size of 8.5 in. X 14 in..
- Print a test page and make sure that the entire page is printed without having some of the bottom margin cut-off.
- If you are still having trouble please give us a call or email us to arrange for a consultation, or a "hands-on" demonstration.
[If you are using a CD-ROM version of this website (available for those who do not have internet access), please insert the disk into your computer's disk drive. Once it opens, click to open the file named "index.html" to open the home page. You may now follow the instructions given in steps 2 and 3 above.] |
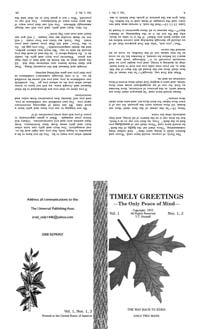
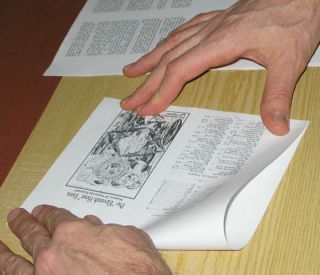
4. Once the selected file opens you should see a page with four panels on it (each panel is a page from the original printed tract).
- You will notice that the top two panels are upside down and the bottom two are right side up (see sample page at right). . This is because the layout is not set up for direct reading but for printing into a sheet that will be folded, collated, stapled, and cut into a tract.
- The page numbering sequence (imposition) will appear to be all scrambled up. This is because you are looking at an actual formatted layout for the print page.
- The print pages will be folded twice into a "signature" (a full print sheet that consists of 8 original tract pages) and collated with other "signatures" to make up the complete tract.
- The collated "signatures" will then be stapled together and trimmed to size to become an actual tract in the original size as Bro. Houteff had them printed.
- Please follow along as we will go through this process in more detail so that you can soon be printing your own copies of the original Shepherd's tract literature!
- Rest assured, this may seem complicated, but with God's help once you have finished your first few tracts the process is really quite simple.
 5. Using a printer with a duplexer unit which allows for double-sided printing, then the print process is very quick and easy. Just issue a print command and when the print dialog page pops up make sure you specify double-sided printing for legal size (8.5 in. X 14 in.) paper. You will have to locate the proper menu box to check this preference (it is found under the layout menu).
Note: By using a printer that prints only on one-side of the paper (single-sided), then you will first have to print all of the odd pages first, which can be done by specifying the sequence 1, 3, 5, … in the pages range box. On most printers you can also specify to print odd-pages only in a page handling dialog box. This saves time and gives better accuracy rather than having to type in a long string of numbers. Once the pages are printed out then you have to carefully shuffle and rotate the pages to print on the backside of each one in the proper sequence.
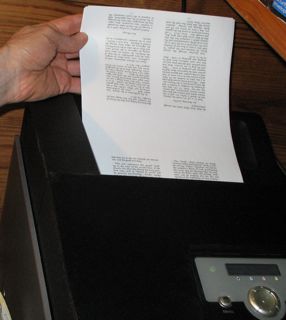
- First take the printed sheets straight from the output tray being careful not to rotate or flip the pages.
- Next shuffle the pages by placing the top page on the bottom going through the whole pile so that in the end the top ends up on the bottom and the bottom page ends up on the top (this is called "inverting the stack").
- Once this is done carefully rotate the stack 180 degrees (top to bottom) and place it directly back into the input tray.
- Next print the even pages only starting from page 2 to the end. The output should then have a set of sheets printed on both sides in the proper sequence. It may take some trial and error to get the printing right, but keep trying until you succeed. Once you have done it correctly, it is as easy as 1, 2, 3.
Special Instructions for tracts having an odd number of print pages: |
|
return to top (Please click if you wish to go back to the top of this article.)
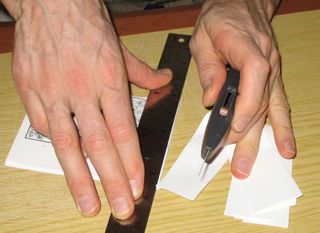
Low-speed Method: Required measuring and cutting tools to produce a tract.
|
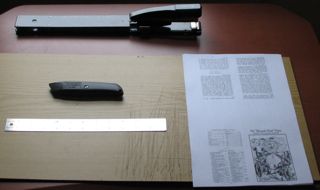 |
Folding and Cutting Instructions: (Low-speed)
Folding:
1. Take the paper stack from the output tray and place them in front of you. You should see 8 tract pages per (8.5 in. X 14 in.) sheet (4 pages per side).
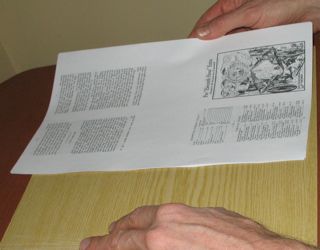
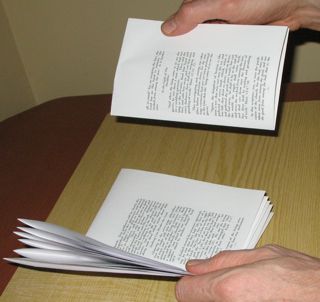
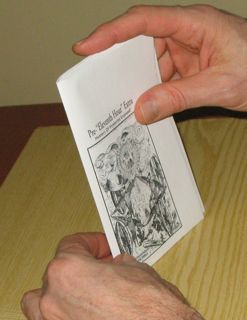
- Take the top sheet and fold the top down to the bottom and crease it. Then fold the left side over to the right to end up with a "signature" that is 1/4 the size of the original (this is called a cross, or right angle-fold).
- Check to make sure the page sequence is correct. The first four pages of the "signature" should be numbered in order, such as 1, 2, 3, and 4, and then skip to a sequence for the last four pages of the tract, e. g., 69, 70, 71, 72.
- Keep in mind that the top edge of each "signature" will be trimmed off which will free the individual pages for flipping.
- Go through the rest of the stack and place each folded "signature" nested inside (or outside) the previous ones.
- At the end you should have all of your folded "signatures" in the proper sequence.
- You now have in your hand a completed unstapled track.
- Check your page sequence for accuracy before stapling.
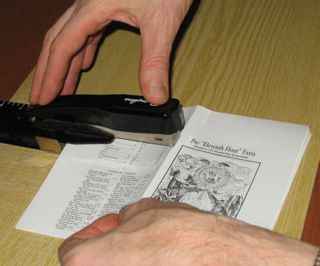
- Using a long-reach stapler, carefully align the collated "signature" set and staple twice along the centerfold crease.
- You may adjust the depth guide for proper placement and easier stapling.
- This will take a little trial and error to place the staples right on the centerfold, but a little practice makes perfect.
| Size Dimensions for Rod Literatures: | |
|---|---|
| Tracts 1-15, Misc. Tracts, Ans. Books: | 3.375 in (8.6 cm) x 5.75 in (14.5 cm) |
| Timely Greetings Vols. 1 and 2, WHR: | 4.0 in (10 cm) x 6.25 in (15.9 cm) |
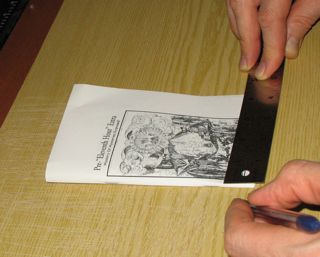
Cutting:
- Once the cut marks are made, then place the tract on a cutting board and trim off the top and right side edges using a steel straight edge and a retractable type razor knife.
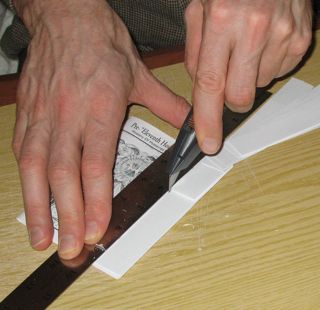
- Use firm even strokes which may take several swipes to cut clean through. Be very careful to maintain a firm downward pressure on the straight edge to prevent shifting and always cut away from yourself in case the knife runs astray. If you have problems with the ruler shifting during your first cut, you can try using some large clips to clamp the ruler to the tract.
- As a precautionary note, do not place excessive downward pressure on the knife as it makes it more prone to making a violent run off course. Several even consistent strokes with medium pressure is better than trying to cut through the whole stack at once.
- Rotate tract and trim off outer edge.
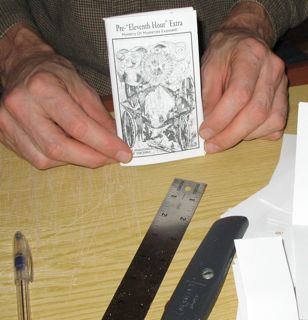 5. Praises be unto the Lord! Finally, you have now produced an original-based piece of inspired Shepherd's Rod literature. May God bless your efforts to spread the truth as the leaves of autumn to bring in precious souls for Him.